


Introduction: When Simple Digitizing Just Won't Cut It
You have a logo with small text. Or fine lines. Or gradients that need to blend smoothly. You send it to a basic digitizing service, and what comes back? A mess. The text is illegible. The outlines overlap. The whole thing looks like someone let a robot loose on your fabric.
I have been there. You need more than just a file that loads on your machine. You need expert hands that understand stitch angles, underlay, pull compensation, and the hundred other tiny decisions that separate a professional stitch-out from a tangled disaster.
That is where specialized Embroidery Digitizing Services come in. Unlike cheap auto-digitizers or generalist shops, expert services know how to handle complex artwork. They understand that a design with too many outlines will stitch out looking like a blob. They know that small lettering requires specific needles and thread weights. They plan every stitch strategically to ensure the final embroidery looks exactly like your original vision.
In this guide, I will walk you through what makes a digitizing service truly expert, how they handle detailed designs, and which specific companies I trust for complex work. No fluff. Just real advice from someone who has tested the limits of what embroidery machines can do.
What Makes a Digitizing Service "Expert"?
Let me be direct. Not every digitizing service can handle detailed designs. The ones that can share three specific characteristics.
First, they understand complex design elements. Blends, multiple outlines, small lettering, and thin outlines are the four horsemen of bad digitizing. An expert digitizer knows how to manipulate blends by introducing additional layers for each color. They know that multiple outlines almost never work well for embroidery, so they limit them and adjust angles to prevent overlapping satin stitches. They know small lettering requires smaller needles and lighter thread, like 60 or 70 weight instead of the standard 40 weight.
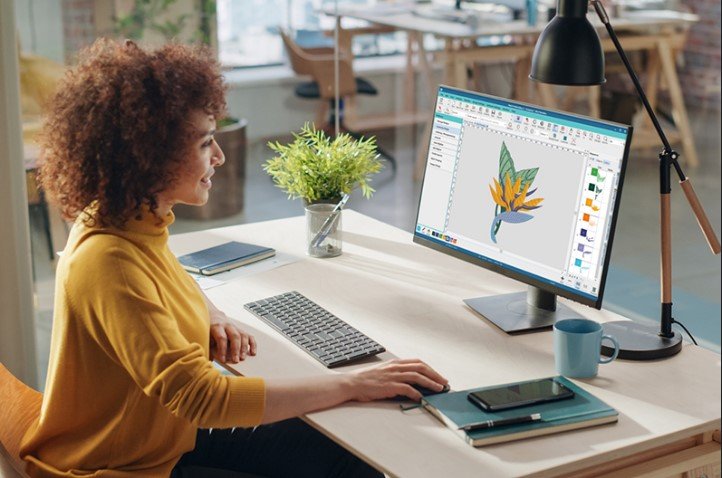
Second, they use professional software with manual controls. Auto-digitizing features in programs like Hatch or Wilcom can handle simple designs, but experts use the full manual capabilities of these tools. They adjust every stitch type, density, and direction by hand. They add underlay stitches strategically to stabilize the fabric before the top stitches go down. They set pull compensation so circles stay round and text stays sharp.
Third, they test their files. Expert services never send a file without stitching it first. They use actual fabric that matches your project material. They check for thread breaks, tension issues, and alignment problems. Only after passing these tests do they deliver the final file.
The Technical Challenges of Detailed Designs
Let me break down exactly why detailed designs cause so many problems for embroidery machines. Understanding this helps you appreciate what expert digitizers do.
Blends and Gradients
Blends are normally created with fill stitches. The problem arises in narrow areas. Fill stitches require multiple needle points, which becomes trouble once the design has to be embroidered in tight spaces. An expert digitizer introduces an additional layer for each color to increase needlepoints without distorting the design.
The direction of blends also matters. Uni-directional blends are the easiest to work with. Radial blends are doable but complicate digitizing unnecessarily. Experts prefer simpler blend directions to save time, effort, and money.
Multiple Outlines
Multiple outlines almost never work great with embroidered designs. Two satin stitches running parallel to each other are likely to overlap, giving a flawed outlook and distorting the crispness of the design. The solution? Experts either edge-run the underlay or alter the angle of outlines. They limit the number of outlines and increase thickness instead of adding more lines.
The problem magnifies even more on stretchy fabrics and hats. That is why expert digitizers always ask about your fabric type before starting a complex project.
Small Lettering
Small lettering is one of the most intricate tasks in custom embroidery digitizing. Designs that are created for general use often include small lettering, especially monograms and logos. But embroidery has minimum stitch sizes. If a design falls below that threshold, it simply will not be visible.
The solution? Use smaller needles and thread size. Standard 40 weight thread is too thick for tiny letters. Experts use 60 or 70 weight thread along with smaller needles to ensure small letters embroider seamlessly. An alternative is using double run stitches instead of satin stitches, though this requires significant practice to master.
Thin Outlines
Thin outlines are also not best suited for embroidery. Satin stitches cannot be used for thin outlines, so experts must turn to run stitches. But trapping fills with run stitches is difficult. Experts who are not very skilled with run stitches will remove thin outlines or minimize their use entirely, using different stitch directions and fill types to render the same effect.
How Expert Digitizing Services Handle Complex Work
Now that you understand the challenges, let me show you how expert services overcome them.
Step One: Artwork Preparation
Experts start with clean, high-resolution artwork. Vector files like AI or EPS are ideal because they scale without losing clarity. If all you have is a low-resolution JPG or PNG, they will spend extra time cleaning it up, removing artifacts, and simplifying details that embroidery cannot replicate.
They also advise you on what will and will not work. If your logo has elements too small to stitch cleanly, they will tell you upfront and suggest modifications. This honesty saves you from wasting money on a file that will never look right.
Step Two: Manual Digitizing with Professional Software
Expert digitizers use tools like Wilcom Embroidery Studio, Hatch, or Tajima Pulse. These programs offer full manual control over every stitch parameter. Unlike auto-digitizing features that guess, experts manually assign:
Satin stitches for borders, text, and fine details
Fill stitches for larger areas and backgrounds
Running stitches for outlines and delicate elements
Underlay stitches to stabilize the fabric before top stitching begins
They also set stitch density based on your specific fabric. Light fabrics like silk get lower density to avoid overloading. Heavy fabrics like denim can handle higher density without distortion.
Step Three: Adjusting for Fabric Type
Not all fabrics behave the same way. Experts ask about your material before digitizing because it changes everything.
Cotton holds embroidery well but may need extra underlay stitches to prevent puckering.
Polyester is more forgiving and can handle denser stitching.
Denim supports heavier stitches and works well with bold logos.
Knits and stretchy fabrics require lighter stitches and cut-away stabilizers to prevent distortion.
A file digitized for a structured cap will fail on a stretchy polo shirt. Experts know this and adjust accordingly.
Step Four: Testing and Revision
Expert services never send a file without testing it first. They stitch a sample on fabric that matches your project material. They check for thread tension issues, fabric behavior, and design fit within the hoop size.
If something is off, they revise it for free. Unlimited edits are standard at reputable services. This testing step is the difference between a file that stitches perfectly on the first try and one that leaves you frustrated and out of pocket.
Which Services Excel at Detailed Design Conversion?
After researching dozens of providers and testing their work on complex logos, here are the services I trust for intricate, detailed designs.
Absolute Digitizing
Absolute Digitizing has been in the game for over twenty years, and their meticulous approach sets them apart. They handle projects of all scales, from small, intricate logos to large, complex designs, optimizing each for the fabric, size, and intended application. Their team of expert digitizers uses professional-grade tools like Wilcom Embroidery Studio Elements 3 and Tajima DG/ML V14.
Where they shine is on tricky elements like blends, small lettering, and multiple outlines. Their digitizers understand the physics of embroidery and apply pull compensation, underlay, and proper density settings that auto-digitizers ignore. Pricing starts at ten to fifteen dollars for standard logos, with complex designs costing more. Turnaround runs two to twelve hours standard, with rush options as fast as two hours.
ZDigitizing
ZDigitizing stands out for their specialized skills in advanced techniques like 3D puff and appliqué digitizing. Their team ensures that even complex artwork with tiny details translates into flawless stitches. Customer testimonials highlight their fast turnaround, detailed color breakdowns, and impressive stitch quality on intricate designs.
Where they excel is on designs that mix multiple techniques. If your logo requires satin stitches, fill stitches, and appliqué in one file, ZDigitizing handles the complexity smoothly. Their pricing is competitive, and first-time customers can often snag a discount.
Digitizing Buddy
Digitizing Buddy has been operating since 1999, and their focus on customer service makes them ideal for detailed designs that need iterative adjustments. One customer reported that Digitizing Buddy kept tweaking pull compensation until his satin text stitched clean on a difficult fabric. Another customer said their file stitched perfectly on a Barudan machine with no learning curve at all.
Where they excel is patience. If your design has tricky elements that require multiple rounds of edits, Digitizing Buddy sticks with you until it is right. Their pricing starts at ten dollars with same-day standard delivery.
When to Choose Expert Services vs. DIY or Auto-Digitizing
Let me be honest with you. Not every design needs an expert. Here is my rule of thumb.
Use auto-digitizing or DIY tools for simple geometric shapes, bold text without fine details, personal projects where perfection does not matter, and learning and experimentation.
Use expert digitizing services for logos with small text under a quarter inch, designs with blends or gradients, artwork that includes multiple outlines, any project going on stretchy or delicate fabric, client work or products you plan to sell, and anything where your brand reputation is on the line.
AI embroidery digitizers have come a long way. Tools like Wilcom's auto-digitizing features can detect object outlines, assign suitable stitch types, and adjust density based on the design. But they still struggle with intricate shading, special effects, and unusual fabrics. Many professionals use a hybrid workflow: AI for the initial conversion, then manual adjustments for quality.
For detailed designs, skip the AI step entirely. Go straight to a human expert.
Conclusion: Your Detailed Design Deserves Expert Hands
Complex logos and intricate artwork push embroidery to its limits. The difference between a file that stitches beautifully and one that falls apart comes down to the digitizer's expertise. Understanding blends, multiple outlines, small lettering, and thin outlines requires years of practice and a deep knowledge of how stitches behave on different fabrics.
Expert embroidery digitizing services bring that knowledge to every project. They start with clean artwork, use professional software manually, adjust for your specific fabric, and test every file before delivery. They tell you when something will not work and suggest alternatives. They revise until you are happy.
For simple designs, auto-digitizing or DIY tools work fine. But for detailed logos, client work, or anything on tricky fabric, pay for expertise. The twenty or thirty dollars you spend saves you hours of frustration, wasted thread, and ruined garments. Your machine deserves better. Your customers deserve better. And you deserve to hit start with confidence, not crossed fingers.