


A good farming plan in Path of Exile 2 should feel repeatable, not like a gamble you run once and regret. The Abyss, Delirium, and Ritual mix works because each mechanic feeds the others. Abyss adds bodies to the map, Delirium makes those packs worth more, and Ritual gives you another shop window after the fighting is done. If you are trying to build a reliable stash of POE 2 Currency, this is the sort of setup that rewards clean play and steady map volume. You will still get dry maps. Everyone does. The difference is that a quiet run can still produce splinters, tablets, tribute rewards, useful bases, and enough smaller drops to keep the session moving.
Start With a Map Area You Can Actually Sustain
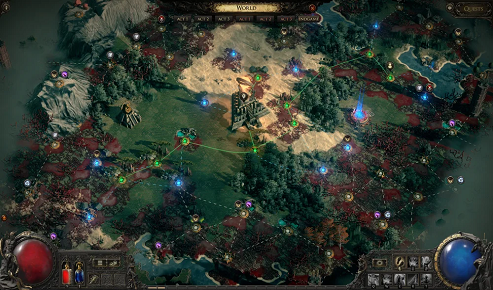
City-style regions are popular for a reason. They tend to offer connected map layouts, nearby nodes, and enough tablet slots to build a proper chain instead of preparing every map from scratch. That matters more than people think. A brilliant tablet setup is wasted if you spend half your time hunting for the next useful map. Look for a cluster where you can run several maps with similar modifiers and keep your route simple. Before committing expensive tablets, test the area with a few regular Waystones. Check the layout, see whether your build gets stuck on tight corners, and pay attention to how often you need to backtrack. A map that looks great on the Atlas can feel awful once Delirium pressure starts building. Comfort is part of profit. If you can clear it without stopping every few packs, you are already ahead.
Use Delirium to Turn Density Into Value
Delirium is what changes this from a normal Abyss farm into a high-density loot run. A strong mirror investment, often around the 200% range when your build can handle it, raises the pressure but also gives those extra monster packs a purpose. More rares appear. More splinters drop. More items roll through your filter. It is tempting to chase maximum Delirium straight away, though that is where many players burn currency. If your character dies twice in a map or loses time picking through dangerous packs, dial it back. A slightly lower investment completed quickly is usually better than a monster map that takes forever. Keep moving while the fog is active, but do not sprint past Abyss openings. Those encounters are the heart of the run, and skipping one to save ten seconds is rarely worth it. A wide-clear build helps a lot here, but solid movement speed and reliable defences are just as important.
Let Abyss and Ritual Cover Different Parts of the Profit
Abyss should receive the heavier Atlas investment because it supplies the monster density that makes the whole loop tick. Prioritise passives that create more Abysses, add rare monsters, or improve rewards from deep encounters. Roll Waystones with care as well. Item rarity, pack size, and modifiers that your build can clear safely all have a noticeable effect over a long session. Ritual plays a different role. You do not need to throw premium tablets at every map for it to pay off. Natural Ritual spawns are enough when you are already filling maps with enemies from Abyss and Delirium. Complete each altar before judging the reward screen, then check for Omens, Divine Orbs, valuable bases, and unidentified Ritual Tablets. Refreshing is useful when the first window is close to something good, not because it feels like you should always do it. Tribute is a resource, so treat it that way. Plenty of players waste it on random low-value items and then miss the one reward worth buying.
Build for Finished Maps Rather Than Big Screenshots
This strategy punishes fragile characters. A build can have impressive damage on a boss and still be a poor farmer if it folds when an Abyss rare, Delirium modifiers, and Ritual monsters stack on the same screen. You want area damage that clears while you move, enough recovery to survive sudden hits, and speed that does not disappear the moment a map gets messy. Item rarity can be useful, but do not wreck your resistances or damage just to squeeze in another rarity piece. The best farming character is the one that completes map after map without drama. Set a strict loot filter too. During dense runs, stopping for every rare item kills momentum. Highlight currency, splinters, premium bases, Omens, tablets, and genuinely useful rares. Leave the rest. It sounds obvious, yet the difference between a tidy pickup routine and panic-looting every pile is massive after twenty maps.
Final Thoughts
The real strength of this approach is that it does not depend on one miracle drop. Abyss creates the encounters, Delirium improves the loot environment, and Ritual gives each map another chance to convert combat into tradable value. Track your results over a full batch of maps rather than judging one lucky or unlucky run. Sell Omens, extra tablets, splinters, and good bases before they sit in your stash for days. As your build improves, you can raise tablet quality and Delirium investment without changing the basic loop. That steady progression is why the strategy remains appealing for players who want more POE 2 Divine Orbs while keeping their mapping routine practical and enjoyable.

 English
 Arabic
 Spanish
 Portuguese
 Deutsch
 Turkish
 Dutch
Dutch
 Italiano
 Russian
 Romaian
 Portuguese (Brazil)
 Greek
Greek